
June 4, 2026

Automating the Impact of Blocked Work in Jira
Guest Authors - Nicolas Brown & Caidyrn Roder | Workflow Optimizers & ProKanban.org Community Contributors
In our previous posts, we covered how to automate the capturing of the flow metrics Work Item Age and Cycle Time to get them visible on work items themselves within Jira.
Whilst this is great, it doesn’t always result in the continuous improvement of the workflow. We know from the Kanban guide that to achieve a better balance of effectiveness, efficiency, and predictability, reflecting and improving our process is an essential practice.
One of the biggest enemies of flow is when work gets ‘blocked’, meaning it cannot progress any further through our process. We’ve covered in previous posts about the pitfalls of a blocked column, but even without this, many teams are still unable to quickly identify:
- When a work item was blocked
- How long it has been blocked for
- If it has been blocked previously/how many times it has been blocked
- How much total time that work item has spent being blocked
Thankfully, we can leverage Jira’s automation functionality, along with some custom fields to make all this information front and centre for every team…
A brief warning on automation rule limits before we get started. The number of automation rules that you can run each month depends on your Jira plan. The approach that we present in this article will increase the number of automation rule runs for your instance, so we recommend checking your current limits and usage before jumping in.
Creating the custom fields
There are two assumptions we make in the guide to configure this.
The first is you (or someone you work with) is able to create custom fields on work items.
The second is that you use the ‘add flag’ functionality in Jira to identify when a work item is blocked.

If you don’t, you can still use this guide to help you via your respective method, but for the purpose of simplicity we’re going to focus on the flag functionality.
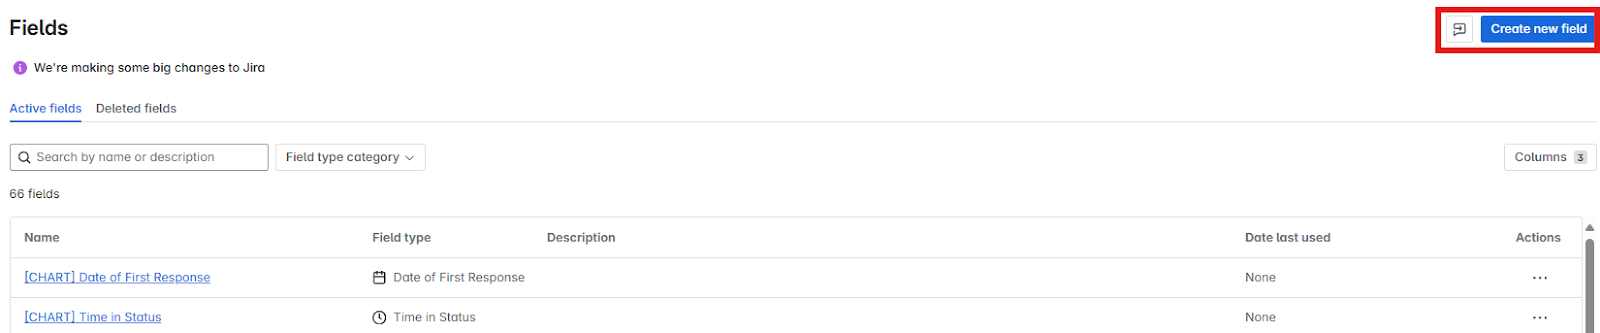
Assuming you have both of these in place, the first thing we need to do is create some custom fields related to blockers. To do this, go to your jira admin page, which will be at (for Jira Cloud):
https://[YourJiraInstance].atlassian.net/jira/settings/issues/fields?query=&orderBy=name&page=0
Here you want to click on ‘Create new field’:
There are four custom fields we’re going to create:
- Blocked Date (Type: Date)
- Number of times blocked (Type: Number)
- Number of days blocked (Type: Number)
- Cumulative number of days blocked (Type: Number)

Make sure to add these fields to the relevant work items that you want them to be visible for (otherwise this whole guide will have been a pointless exercise!).
Configuring the automations
Now those custom fields are done, we need to set up three automations:
- When an item is blocked
- Counting the days when items are blocked
- Handling when an item is unblocked
1. When an item is blocked
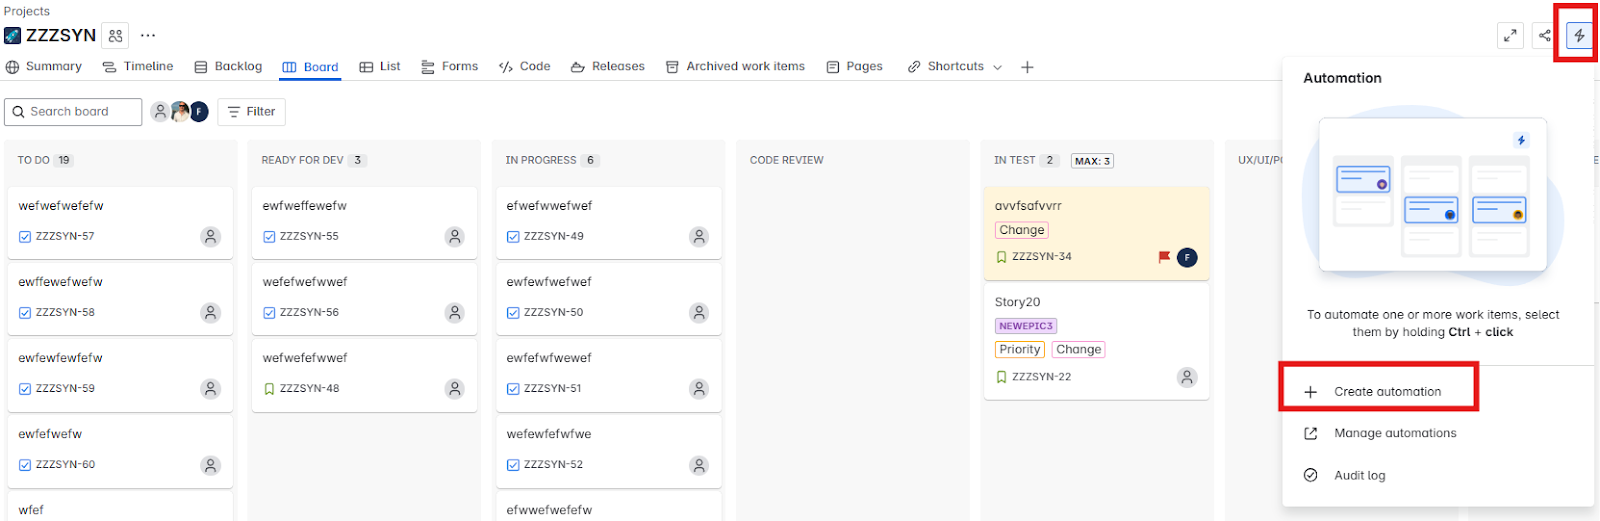
In your kanban board, you want to click on the automation button, then Create automation:
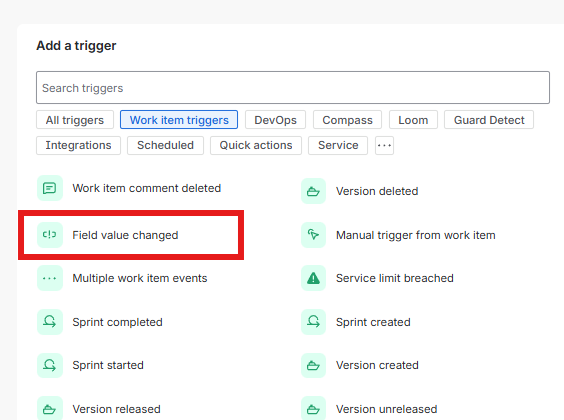
We first want to establish the ‘trigger’ for the first automation, which should be when a Field value changed (which is under ‘Work item triggers’):
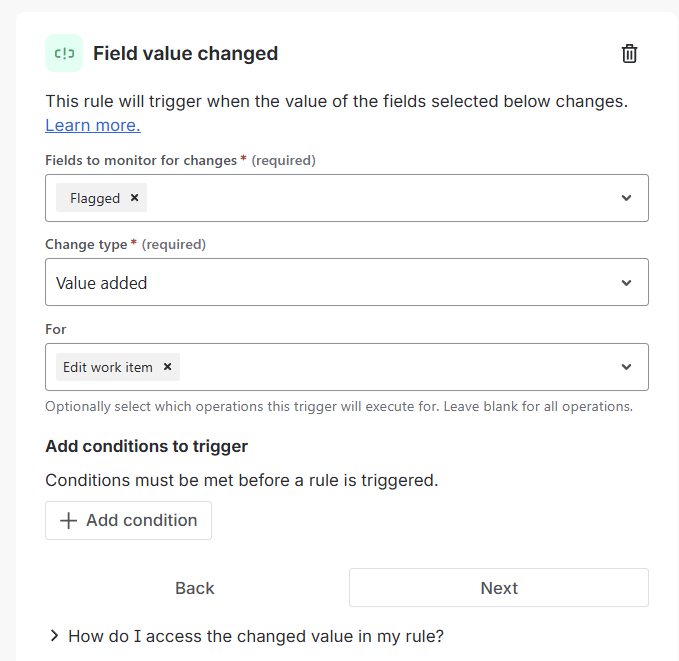
We will get presented with our Fields to monitor for changes, Change type and For options. For our Fields to monitor for changes we want to use ‘Flagged’. For our Change type we want to use ‘Value added’. The For field should be set to ‘Edit work item’:
Click ‘Next’, and choose a ‘Then’ action. Here we want to select our Blocked Date field in the Choose fields to set… option, then add a smart value of:
{{now}}

This will set the current date for when an issue is flagged as blocked, which gives us our blocked date. It’s worth noting that this returns the current date and time in UTC+00:00, so if you wanted something specific to your timezone you might use {{now.convertToTimeZone("Australia/Sydney")}}.
We want to add another ‘Then’ step, which is to populate our Number of times blocked field. Just follow the same step as before, using this field in your Choose fields to set… option, then add a smart value of:
{{#=}}{{issue.Number of times blocked}} + 1{{/}}

We want to add another ‘Then’ step, which is to populate our Number of days blocked field. Again, follow the same step as before, using this field in your Choose fields to set… option, then add a smart value of ‘0’:

Now, some of you reading may suggest that this should in fact be ‘1’, in the same way we +1 to our Work Item Age or Cycle Time to avoid getting values of 0. I must stress, this is entirely up to you what you decide. There is nothing in the Kanban Guide mandating what you choose as your approach 🙂
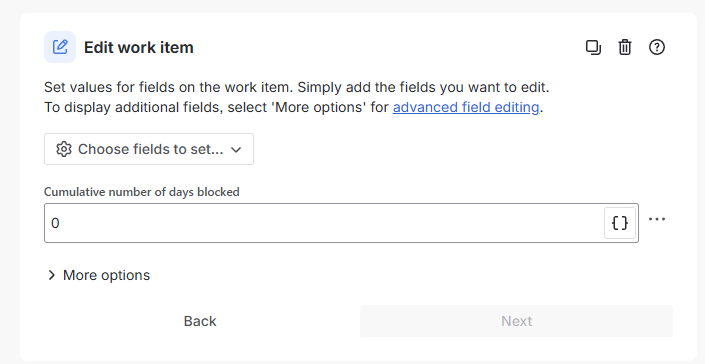
Next, we want to populate our ‘Cumulative number of days blocked’ field, but only if it’s empty. Add an IF statement for this:

Then add a smart value of ‘0’:
Save the automation with whatever name you prefer, then that’s the first automation done.
2. Counting the days when items are blocked
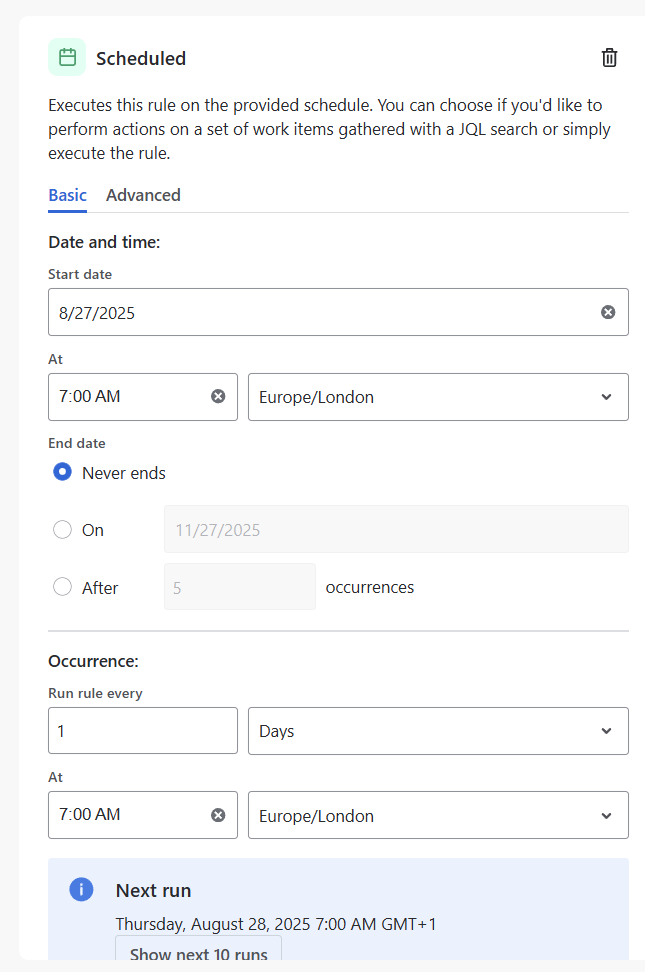
The next automation to set up is to increment the number of blocked/cumulative blocked days for as long as the item remains blocked. We first want to establish the ‘trigger’ for the automation, which should be running it on a daily basis (which is under ‘Scheduled’):

Firstly we want to set up the schedule which is daily and, more often than not, before we start work for the day, so then the blocker information is updated on work items ahead of our stand-up. Of course, make sure the timezone matches yours!
Scroll down a bit further, and tick the box to Run a JQL search and execute actions for each work item in the query then add the following:
flagged = Impediment
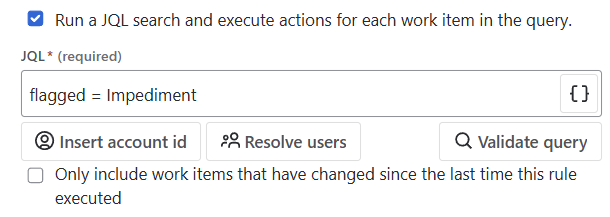
If you click ‘Validate query’ it should bring back a number of work items (all those that are flagged) that match that criteria. Here you can obviously add more complexity to the JQL, for example you might only want to update the ‘Number of days blocked’ for Stories, not Epics. For the purpose of brevity we’ve kept this simple and just looked at everything that is ‘Flagged’. Make sure the tickbox underneath is also ‘unticked’.
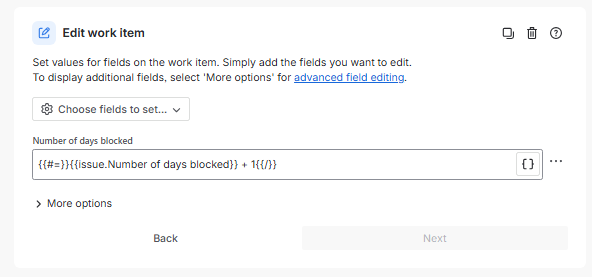
Click ‘Next’ then you want to choose THEN: add an action. Here is where we are simply going to +1 to our number of days blocked, which would have been 0 on our first day. Make sure you choose ‘Numbers of days blocked’ in your Choose fields to set… option, then enter:
{{#=}}{{issue.Number of days blocked}} + 1{{/}}
We want to do the same for our cumulative number of days blocked too, so repeat the ‘Edit work item’ step and use the following:
{{#=}}{{issue.Cumulative number of days blocked}} + 1{{/}}

Then save your automation, we’ve got one more to go!
3. When an item is unblocked
Our final automation is just when the flag is removed. We’re going to use Field value changed again as our trigger, but this time when the change type is ‘Value deleted’:

The final step is to just clear those fields with ‘Blocked Date’ and ‘Number of days blocked’, as they’re no longer valid. Choose the Edit work item action and leave them both blank/empty so they reset.

That’s it all set up!
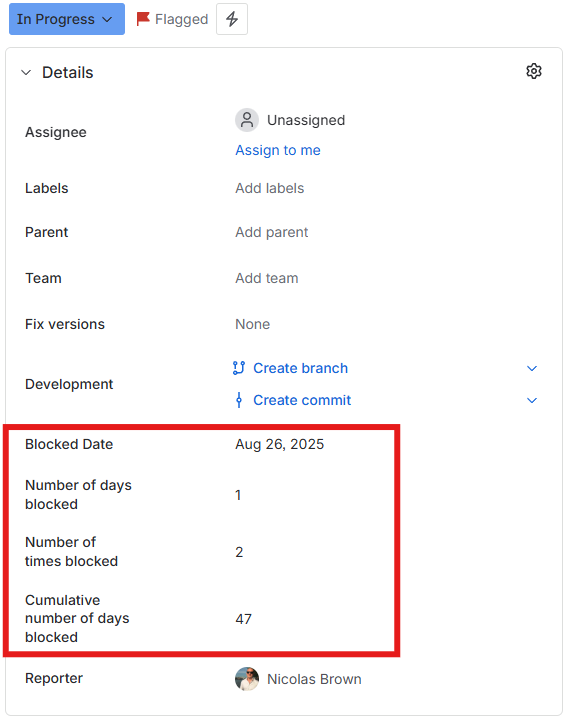
What we can now see is for our blocked items all the relevant information around when they were blocked, how long they’ve been blocked for, how often they’ve been blocked and what’s the total time spent being blocked:
We can of course take this further - at the beginning of this blog I mentioned how we should always be striving to continuously improve our workflow.
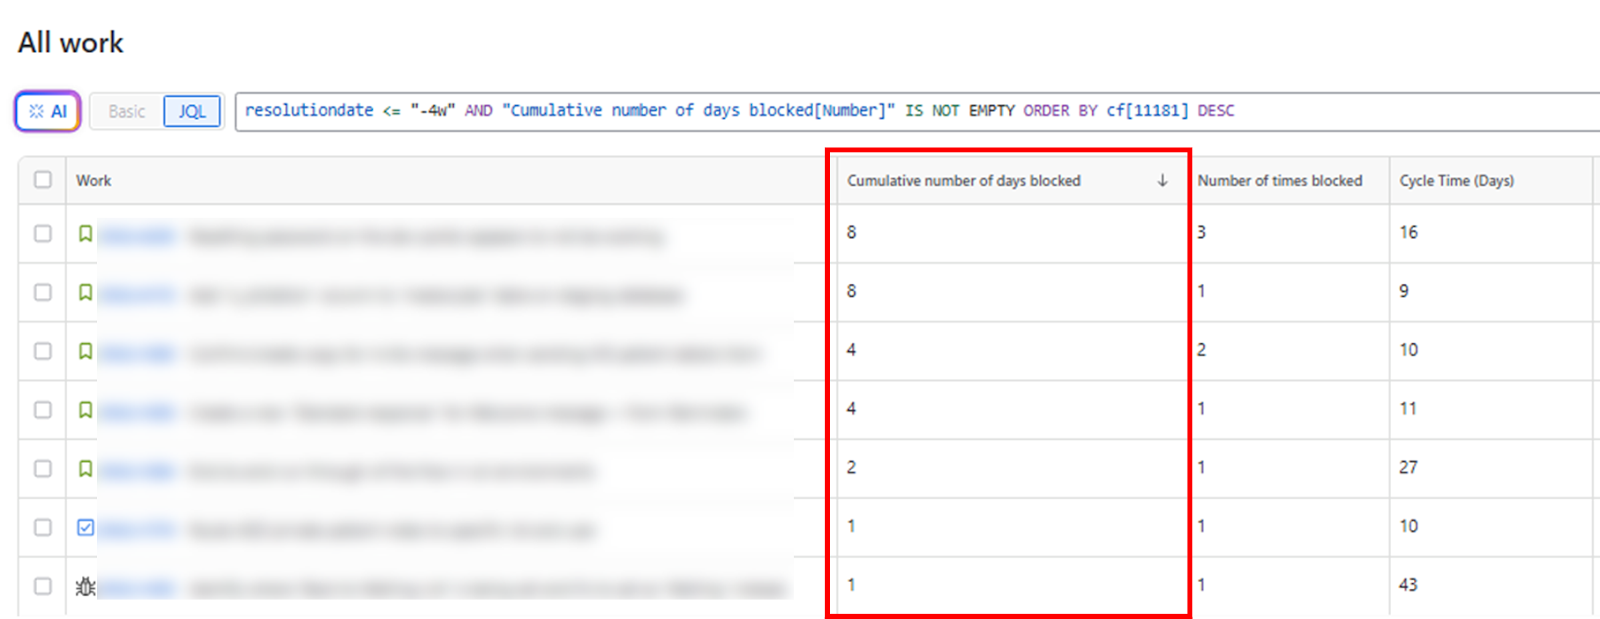
Blocker clustering is a fantastic technique for this, through analysing blocked work and what the route cause was, we can identify themes and (hopefully) changes to make to our process. A simple JQL that leverages this information can help us significantly. Simply by using:
resolutiondate <= "-4w" AND "Cumulative number of days blocked[Number]" IS NOT EMPTY
I can get a list of completed work in the last 4 weeks, which can then be ordered by which of those spent the most time blocked - a continuous improvement dream!
We can then use this data to identify tangible improvements we can make to our workflow.
