
July 7, 2026

Automating Cycle Time in Jira
Guest Authors - Nicolas Brown & Caidyrn Roder | Workflow Optimizers & ProKanban.org Community Contributors
Note: This post is Part 2 of our flow metrics automation series! If you haven't read Part 1 yet, we highly recommend starting there first—it covers Work Item Age, which provides the foundation you'll need to fully understand the cycle time concepts we're exploring today. We have crafted both posts to build on each other for maximum impact.
Building on from our previous post, another flow metric we can automate is Cycle Time. Cycle Time is another metric to monitor to help your team(s) improve their predictability. The Kanban guide defines Cycle Time as the elapsed time between when a work item started and when a work item finished.
As we mentioned previously, as teams start to take more interest in how their work flows, one of the biggest ways you can help get buy-in/adoption of using this for improving a workflow is making that information easy to access. Flow metrics like Cycle Time are a massive help for teams, but more often than not are in a separate tool or URL, which makes it too easy to ignore. And unless it’s right in front of them, it’s rarely part of the conversation.
Thankfully, we can leverage Jira’s automation functionality, along with some custom fields to make Cycle Time front and centre for every team…
A brief warning on automation rule limits before we get started. The number of automation rules that you can run each month depends on your Jira plan. The approach that we present in this article will increase the number of automation rule runs for your instance, so we recommend checking your current limits and usage before jumping in.
Configuring the automation
There are two assumptions we make in the guide to configure this. The first is you (or someone you work with) is able to create custom fields on work items.
The second is that you used the previous blog post (either the simple or complicated version) to configure Work Item Age on your work items. If you haven’t done that, this won’t work, so best to go back and read/set that up if you haven’t done so already.
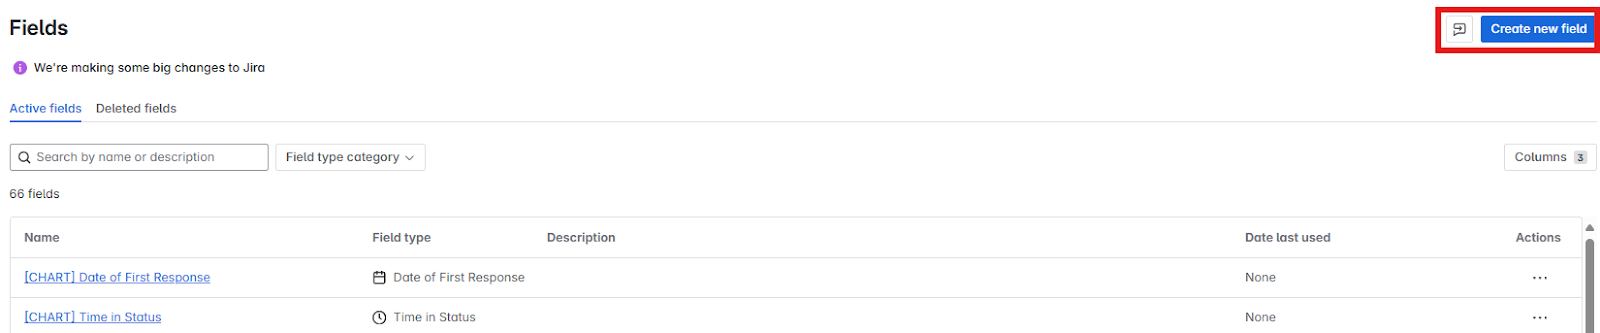
Assuming you have both of these in place, the first thing we need to do is create a custom field for Cycle Time. To do this, go to your jira admin page, which will be at (for Jira Cloud):
https://[YourJiraInstance].atlassian.net/jira/settings/issues/fields?query=&orderBy=name&page=0
Here you want to click on ‘Create new field’:
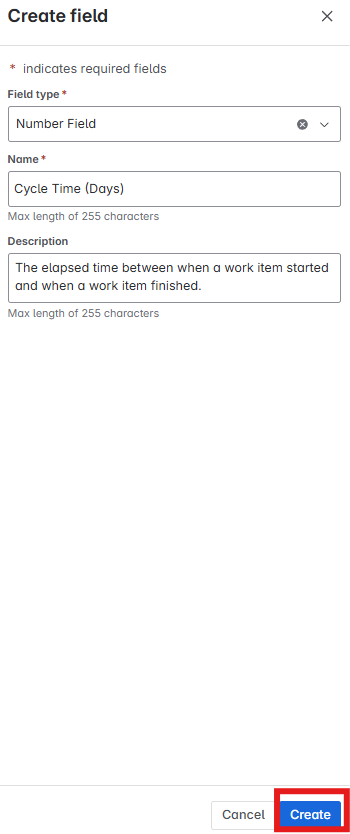
Here you want to choose a field type of ‘Number’ then give your Cycle Time field a name and (optional) description, then click ‘Create’:
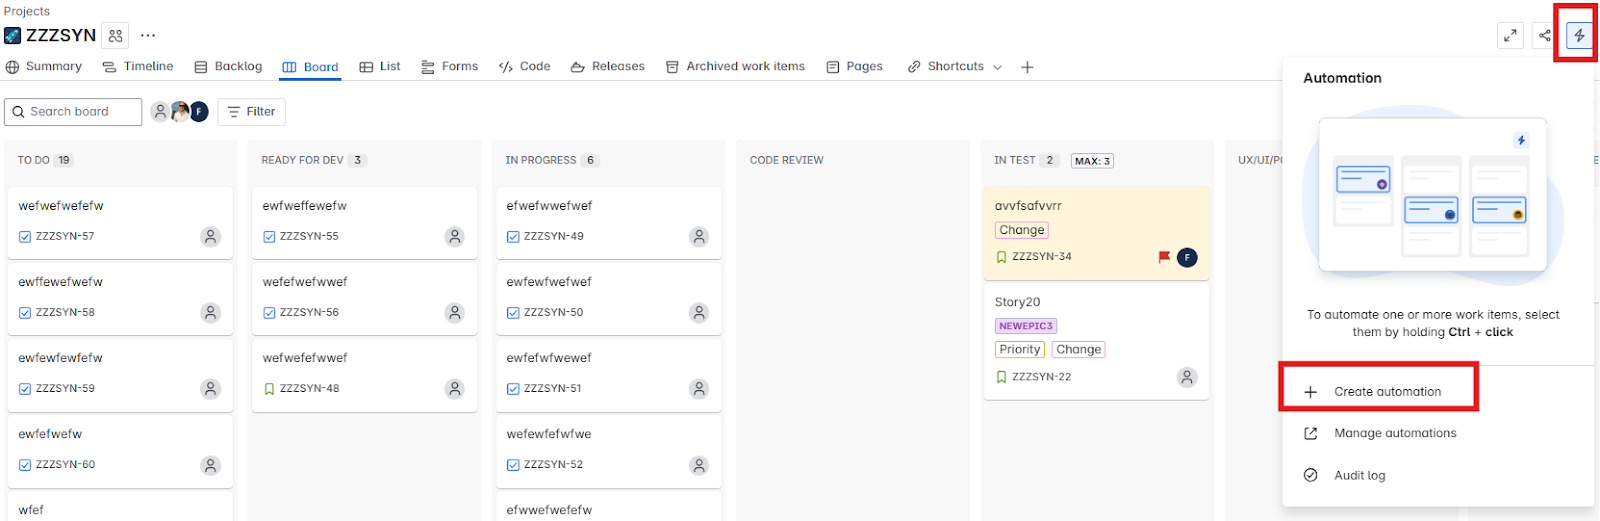
Next, in your kanban board, you want to click on the automation button, then Create automation:
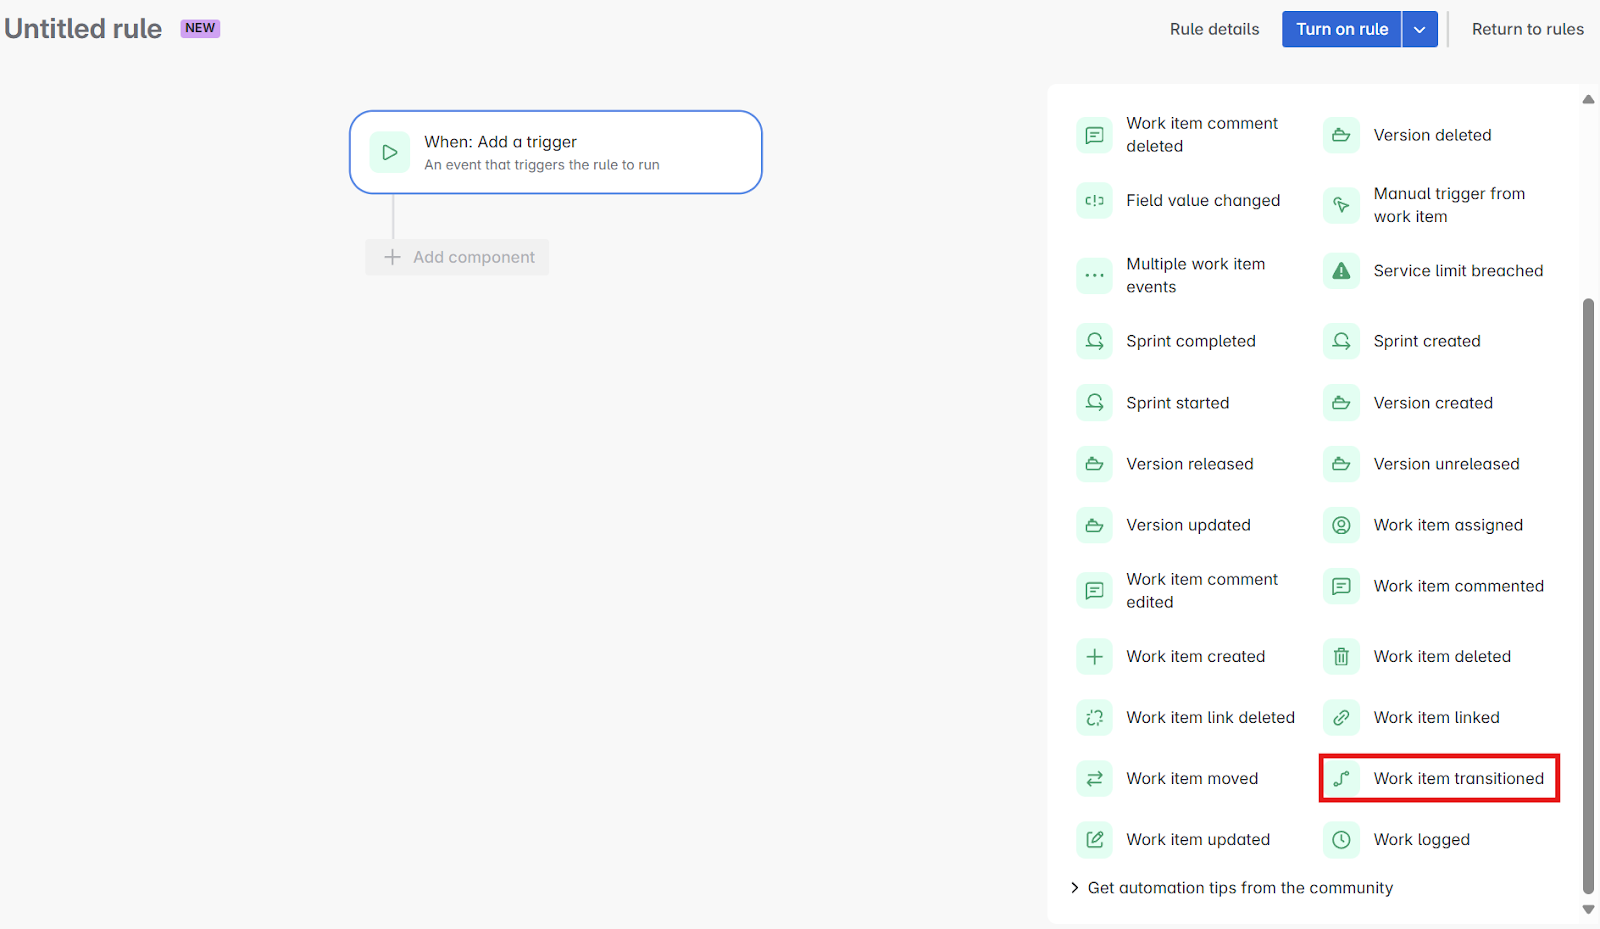
We first want to establish the ‘trigger’ for the automation, which should be when a work item transitioned (which is under ‘Work item triggers’):
We will get presented with our From status and To status. For our From status we want to leave this blank, and for our To status we want to include any of our statuses in our ‘Done’ status category (status will have a green background). Thankfully in this example we just have one which is called ‘Done’:
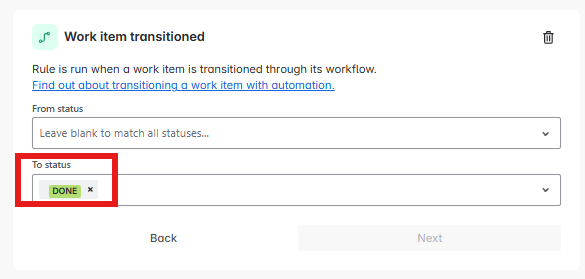
If you’re working in a Jira instance with multiple “Done” statuses and configuration that may change without notice, you can use the more complicated transition trigger approach that we outlined in our previous post under the heading “1. Transition to In progress”.
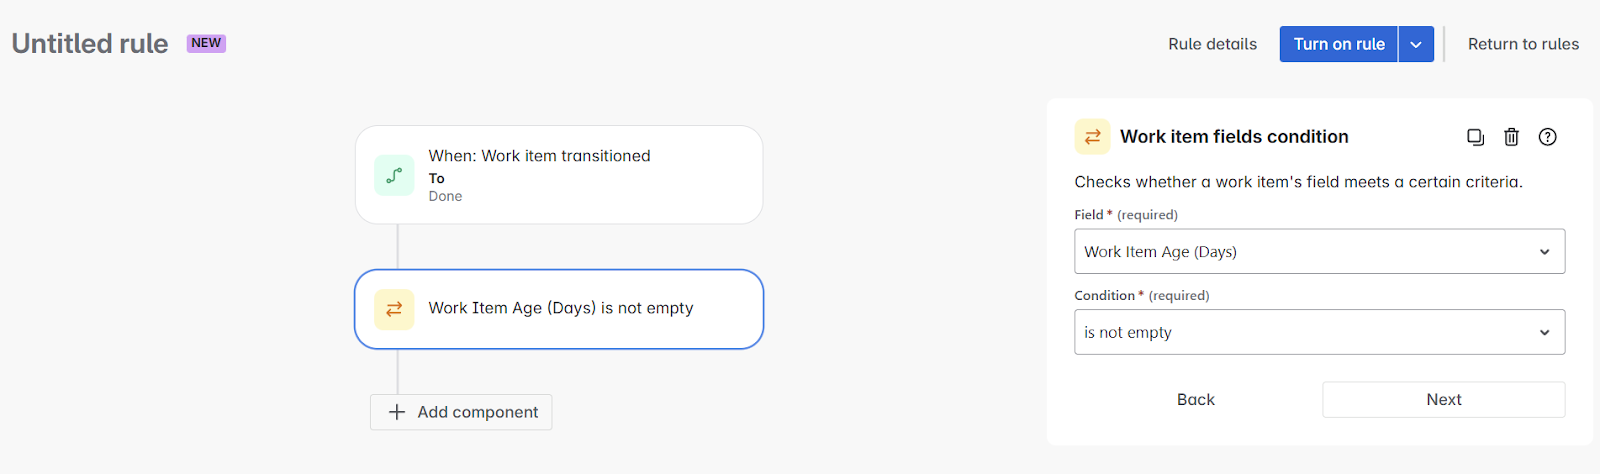
Then we want to add a condition, whereby we are only doing this when Work Item Age has a value, as this is what we will be using for our Cycle Time. So we check here for Work Item Age having a value using ‘Work item fields condition’:
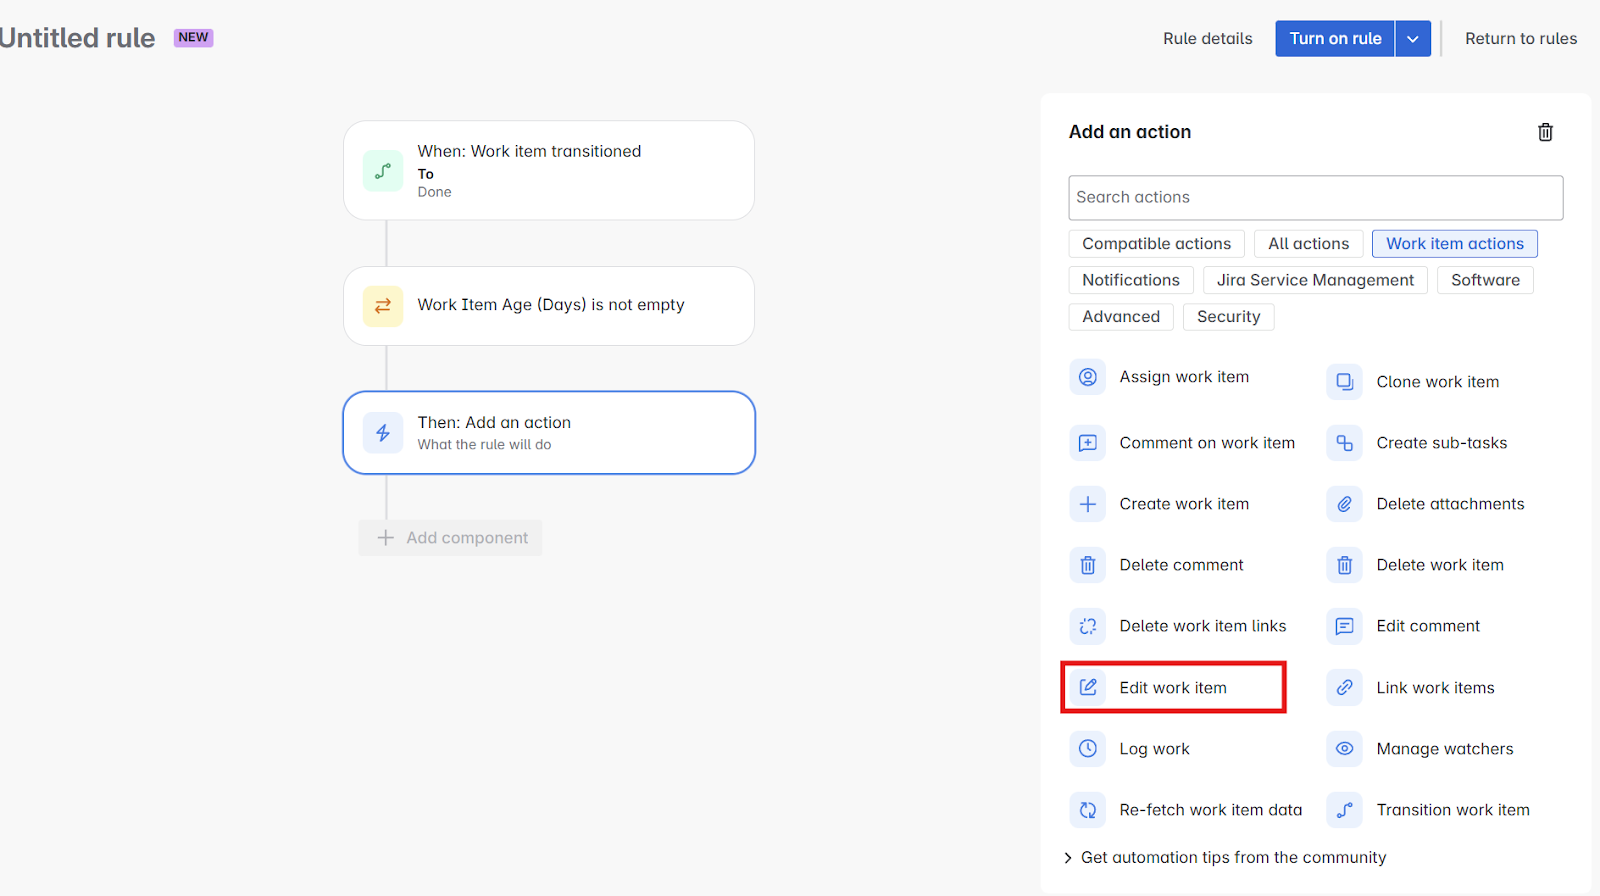
Then we want to add an action, here we want to choose Edit work item:
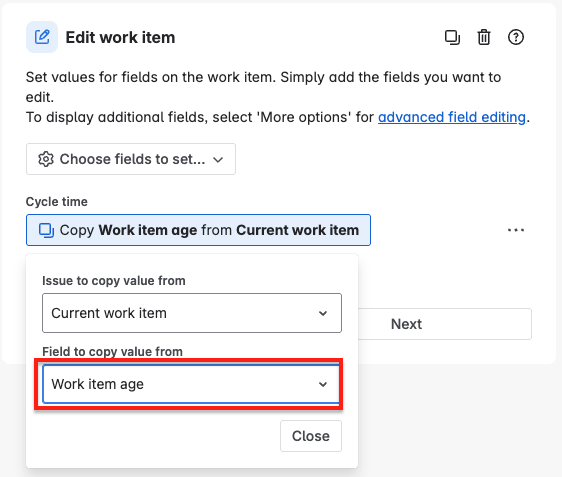
Now what we are going to do here is we are going to take the value from work item age and populate cycle time with this value. In choose fields to set, select Cycle Time then click the 3 dots to the right and select the option COPY.
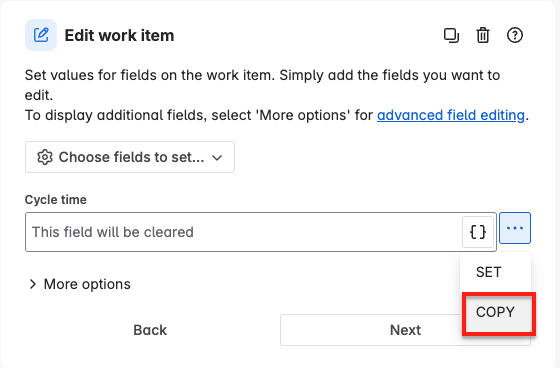
Then select Work item age from Field to copy value from.
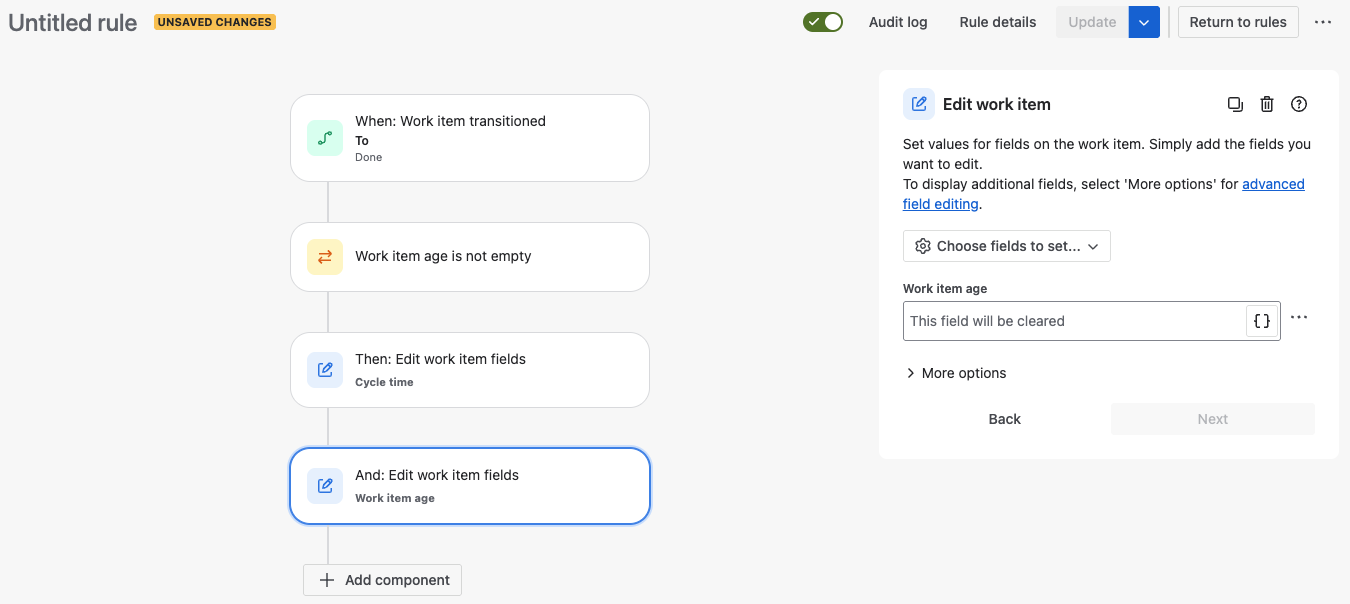
Finally, what we want to do is make sure we ‘clear’ the value of Work Item Age, as the work item has moved to ‘Done’, Work Item Age is no longer a relevant metric for that item. So we just need to add one more step where we ‘Edit work item’, choose our field of Work Item Age and leave this empty (so the field will be cleared):
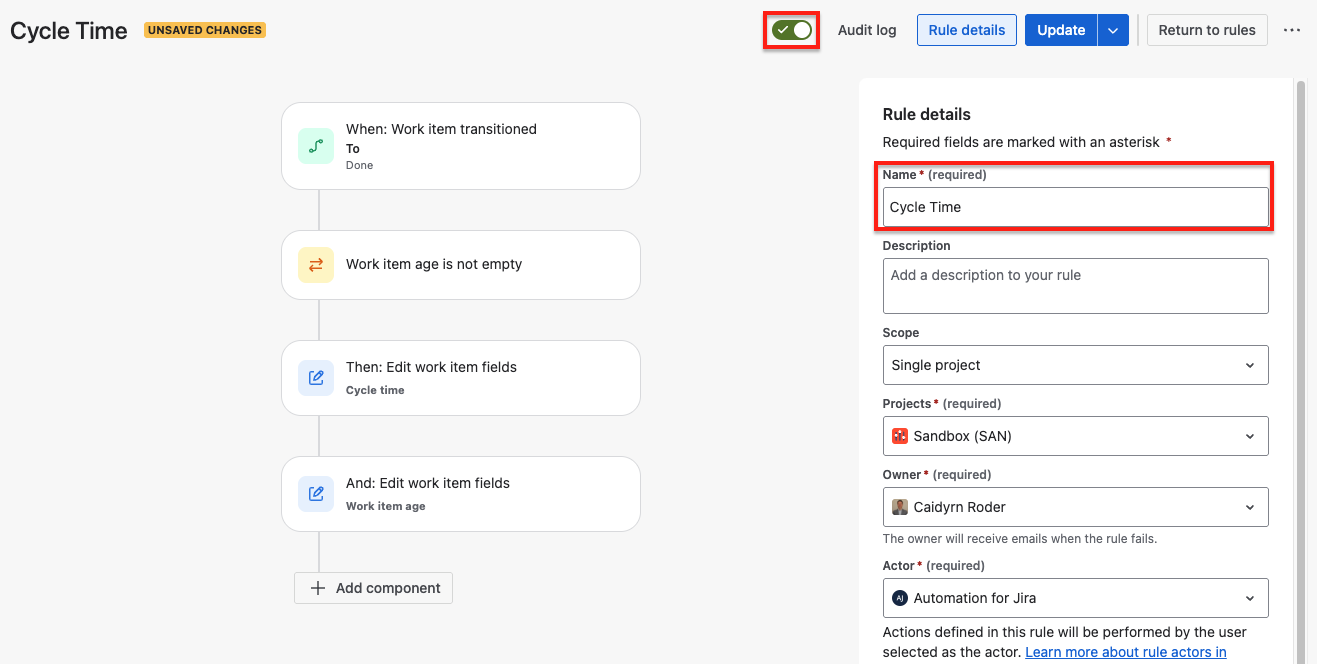
Then all we need to do is name our automation and ensure it is enabled:
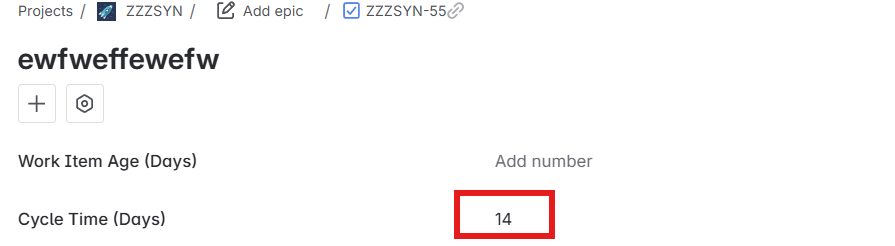
Once it runs (there’s an incentive to finish something 😉), you’ll then see Cycle Time appear on the work item form, like so:
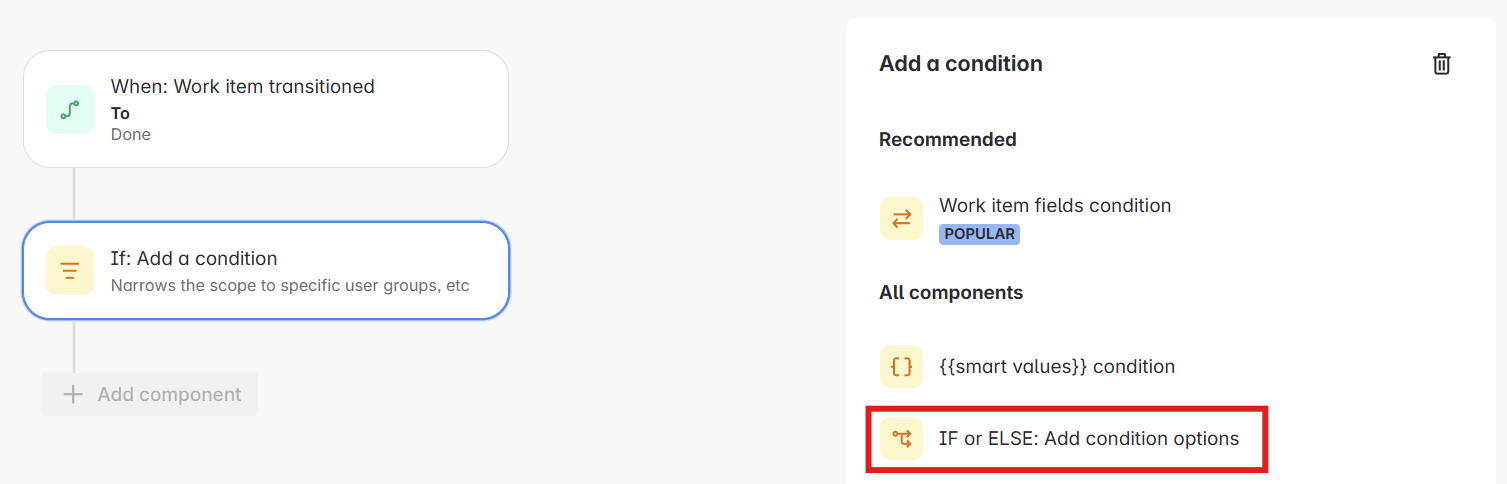
Now of course, this approach does not account for work items that do not have a Work Item Age and go straight to ‘Done’. How you handle these is up to you, you might be happy just leaving the cycle time as empty. You might also want to default to a value of 1 (or a value of your choosing). To do this, you would need to change the first step in your automation to be IF or ELSE condition:
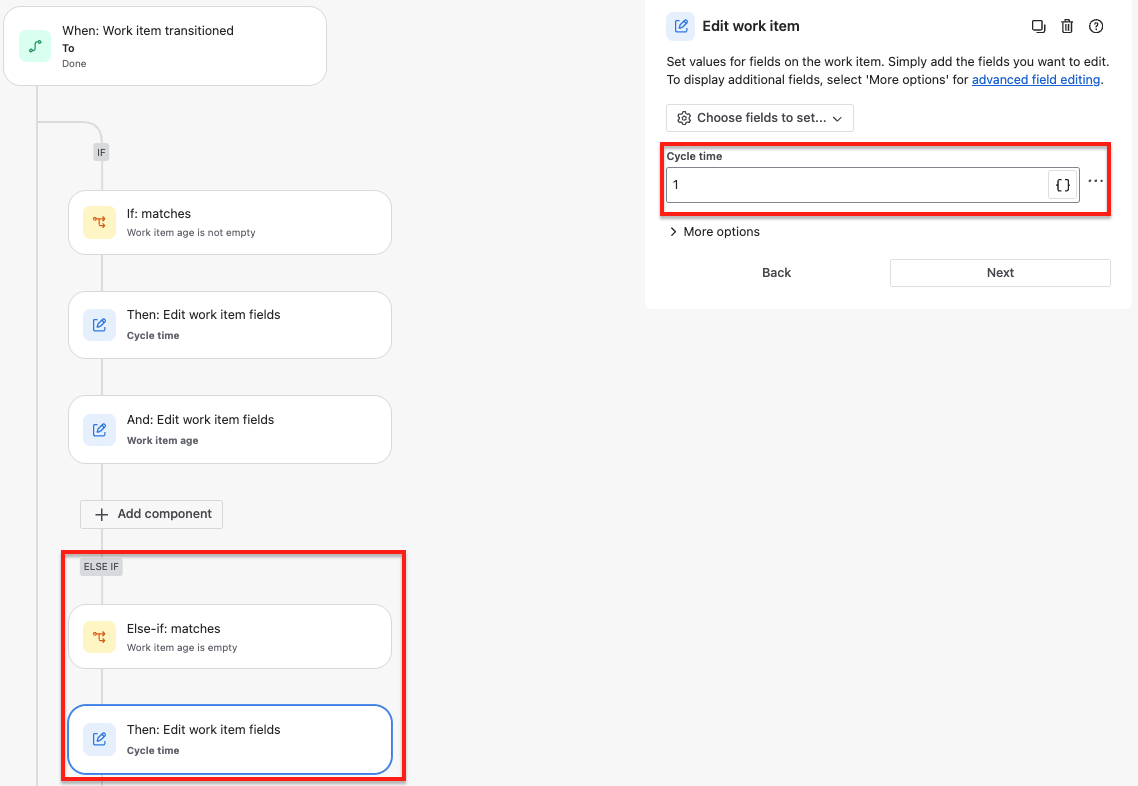
Then you will need to add in a second condition for those items that ‘skip’ straight to Done, as Work Item Age will be EMPTY. If you wanted to default this to 1 it would look like so:
Either way now we have made this information highly visible to everyone in the team, without the need to navigate away from the ‘work’ to find out information on how long work took to flow to completion.
Next, it’s also a good idea to clear Cycle Time when a work item is transitioned from Done back to a To Do or In Progress status (Cycle Time is only relevant for Done work items).
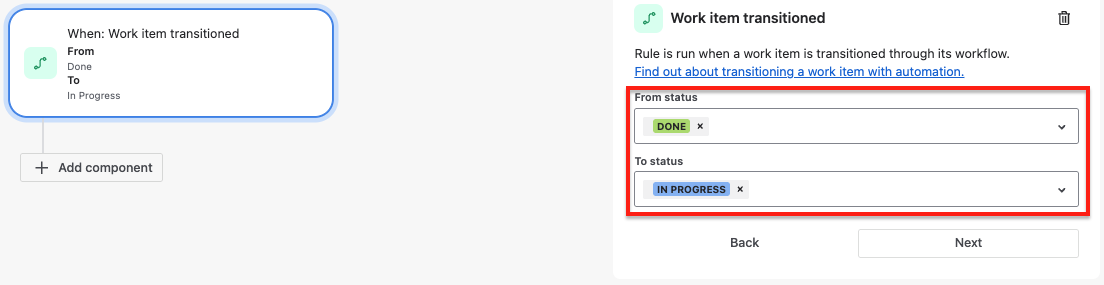
Start by adding a new rule and then select the Work item transitioned trigger. Select From status of Done and To Status on In Progress (substituting your Done / In Progress statuses).
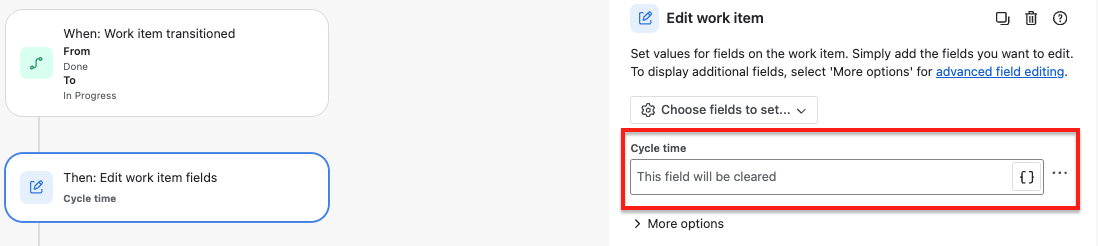
Now, select THEN: Add an action and select the Edit work item option. Select the field Cycle time and leave it blank to clear it.
Give the rule a name and then turn it on. You can apply the same logic for transitions back to To Do statuses. You can also avoid hardcoding statuses (making the rules easier to maintain) using the techniques we described in our previous post (see the complicated version).
A note on a limitation of this approach. If work items ever move from Done back to In Progress or To Do, you will get inaccurate Cycle Time (and Work Item Age) figures. The solution to this is to capture the date work items moved to in progress and then use that to calculate both Cycle Time and Work Item Age. We described how to capture In progress date and use it to calculate Work Item Age in our previous post (see the complicated version). We’ll leave it as an exercise for the reader to extend this functionality to capture Cycle Time.
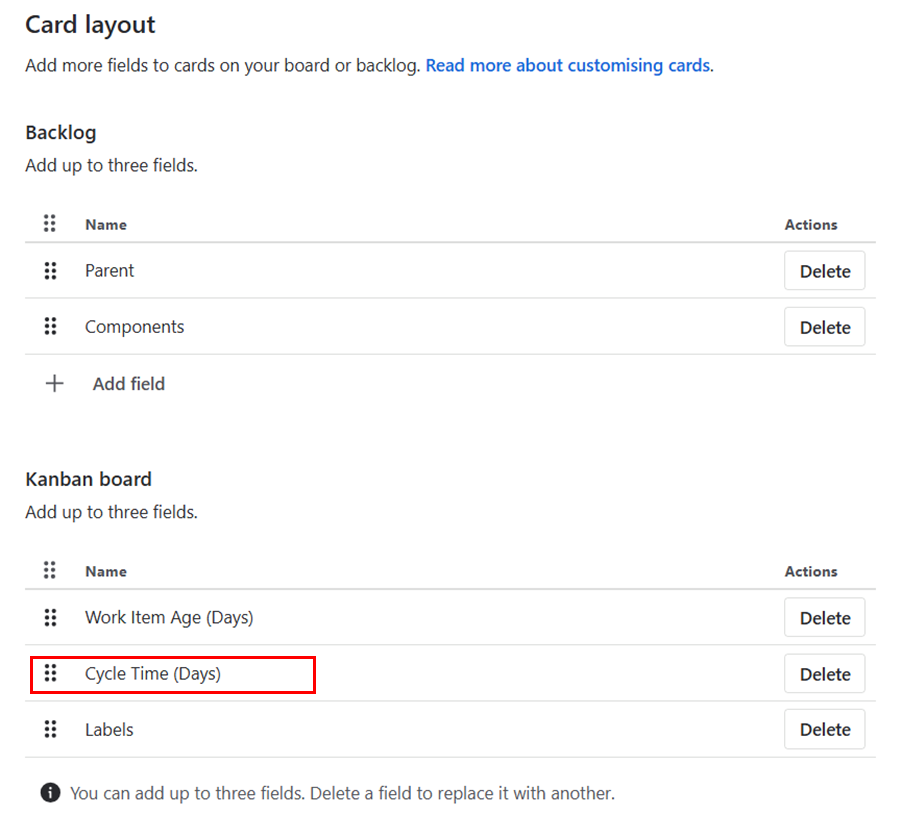
Finally, we can then take this further, making the Cycle Time field a visible field in our Kanban Board view:
Therefore when items move to ‘Done’ we can see the number and hover to reveal that this was the Cycle Time:
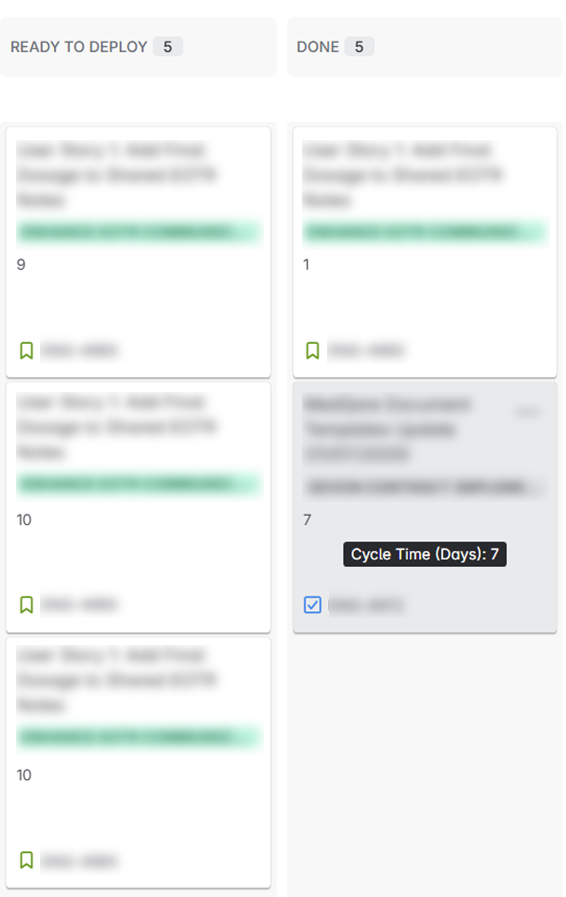
Then Cycle Time can be front and centre whenever we complete an item on our board.
Combined with the Work Item Age automation techniques from Part 1, you now have a more robust toolkit for automating these flow metrics in Jira. These two metrics together will give you unprecedented visibility into your team's delivery patterns and help to identify improvement opportunities. Happy automating!